![]()
![]()
![]()
![]()
|
|
|
|
|
Go to:
Main menu > Clients module > Clients menu > Client Details
OR
Main menu > Clients module > Clients menu > Animal Details
OR
Main menu > Clients module > Clients menu > Animal Details > History
OR
Main menu > Clients module > Clients menu > Reminder Schedule > select reminder code > enter date range > Run > Merge
OR
Main menu > Clients module > Clients menu > Marketing Schedule > Insert > enter details > Run > Merge.
There has been a major upgrade of the VPMmail functionality and window layout.
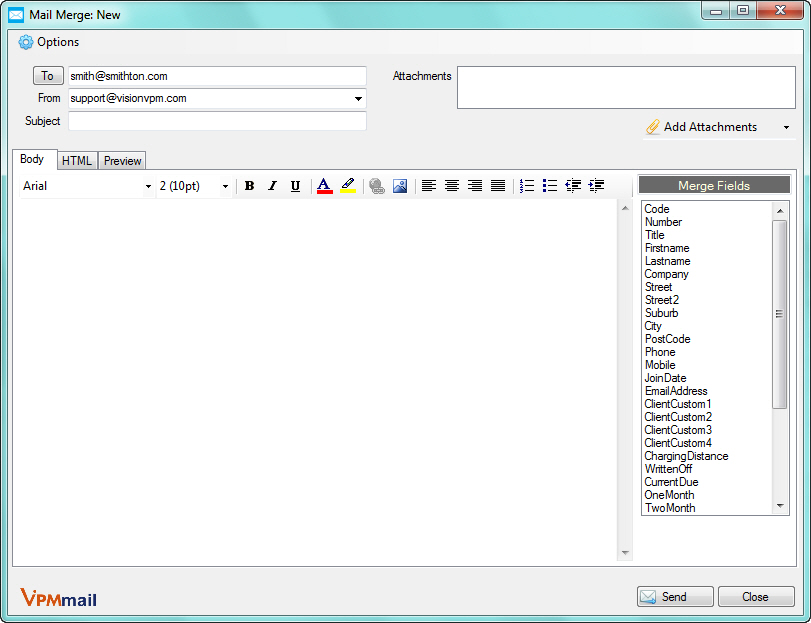
Mail Merge window in this version:
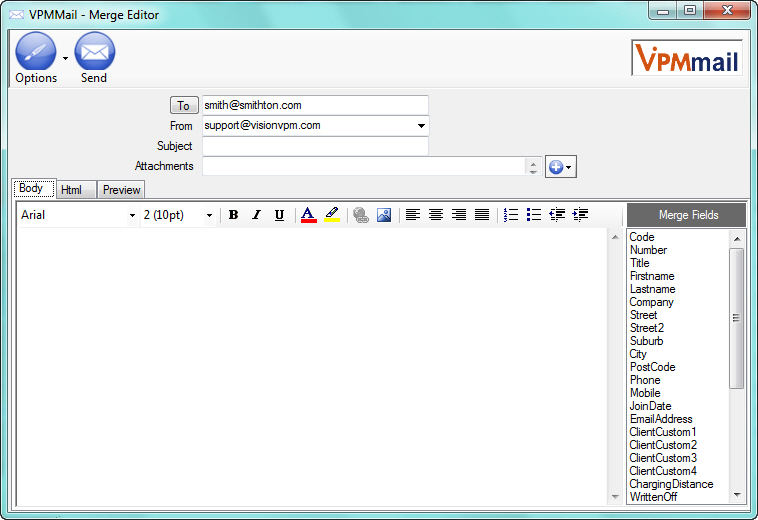
Mail Merge window in previous version:
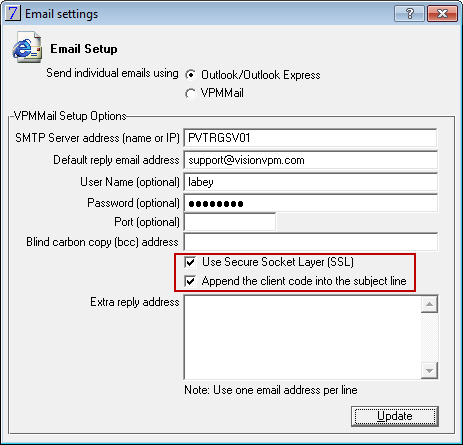
VisionVPM has increased compatibility to communicate with Internet Service Providers (ISPs) that require additional secure features such as Secure Socket Layer (SSL).
To enable this function go to: Main menu > Clients module > Clients menu > Email / SMS Options > Email Setup and select the Use Secure Socket Layer (SSL) check box.
You can also select to add the client code to the email subject line. This should help to alleviate bulk email runs being stopped by ISPs treating the emails as spam.
To enable this function go to: Main menu > Clients module > Clients menu > Email / SMS Options > Email Setup and select the Append the client code into the subject line check box.
The Send button has been moved to bottom right-hand side of the window.
A Close button has been added to the bottom right-hand side of the window.
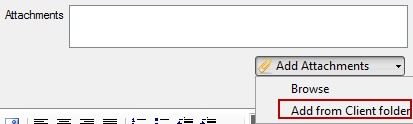
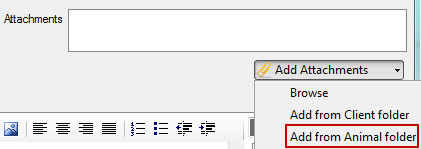
The Attachments field has been moved to the top right-hand side of the window.
An Add Attachments button has been added to the window. There are three possible options:
Options menu in previous version: 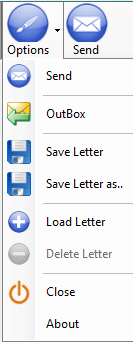 Options menu in this version
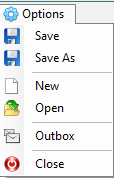
The Load Letter option has been renamed to Open.
When you select Open, VisionVPM will display the Templates window containing your previously saved emails.
From the Templates window you can:
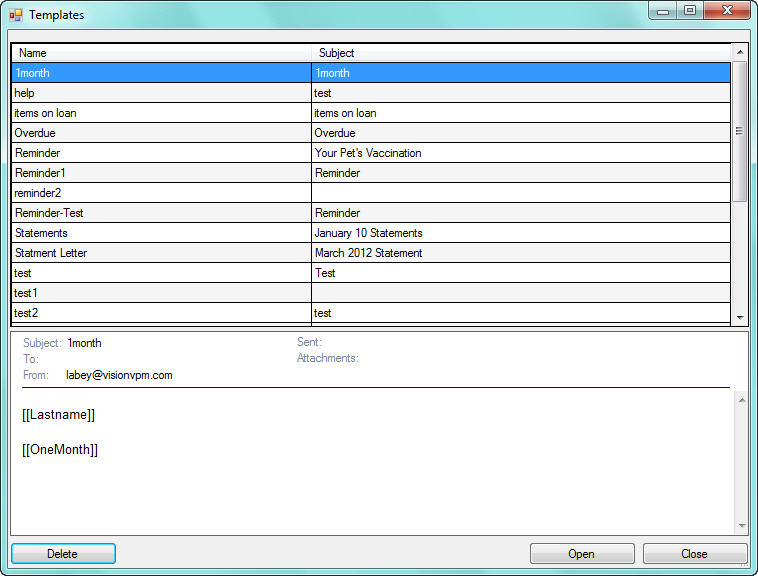
If you select a template and then decide to not use this template, to easily remove the template, click New. You can then click Open again and select another template.
Major development work has been focused on this area resulting in a more efficient and effective method of maintaining emails.
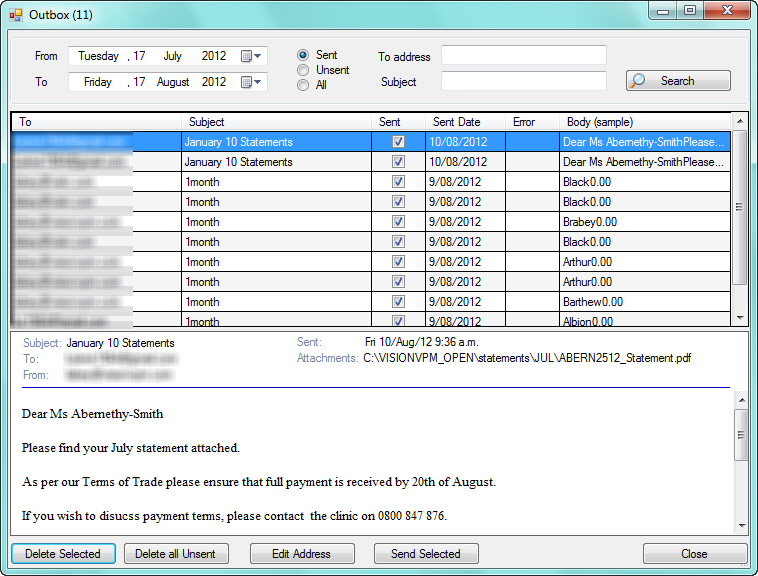
You can now view All emails, only Sent emails or only Unsent emails in a given date range. VisionVPM will default to today's date.
You now have the ability to search for emails based on email address and/or subject.
Other options:
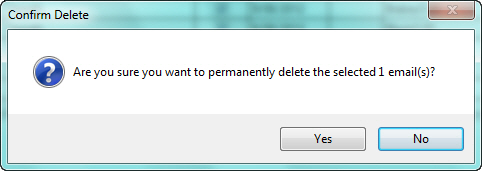
Delete Selected: VisionVPM will delete all selected emails. When you select this option, the following prompt will be displayed. Click Yes to continue only if you are sure you want to delete the email(s).
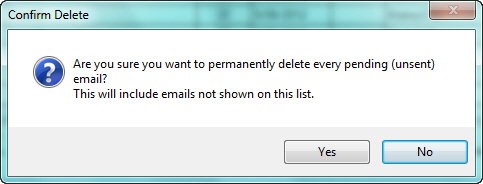
Delete all Unsent: VisionVPM will delete all unsent emails. When you select this option, the following prompt will be displayed. Only click Yes if you are sure you wish to delete all unsent emails.
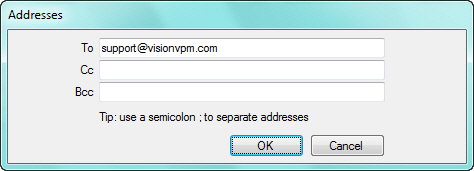
Edit Address: allows you to edit the email address of the selected email. You would use this option, for example, when you wanted to send the same email to another person. The following window will be displayed from where you can change or add the email addresses.
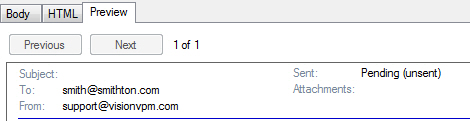
The layout of the Preview tab has changed in this version to include the following items:

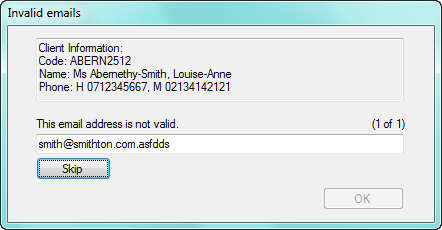
Previously, when you were sending bulk email, VisionVPM would stop the run when it came across an invalid email address.
Now, VisionVPM checks the emails before it sends and when it finds an invalid address, a window similar to the one below will be displayed.
You can then either change the address to the correct format or click Skip to ignore this email address.
See Also |