![]()
![]()
![]()
![]()
|
|
|
|
|
Go to: Quick Access > Toolbar Setup.
An additional navigation feature has been included in this version allowing you to simply click an icon to open a window. You can set all workstations to use the same toolbar or each workstation can use their own individual toolbar.
When you select the option VisionVPM will display the following prompt:

Click Yes to set up a toolbar for an individual workstation or click No to set up a toolbar if you want all workstations to use the same toolbar.
The Toolbar Menu Options window will be displayed.
To select the icons you want displayed on the toolbar, double-click the required option from the list on the left-hand side.
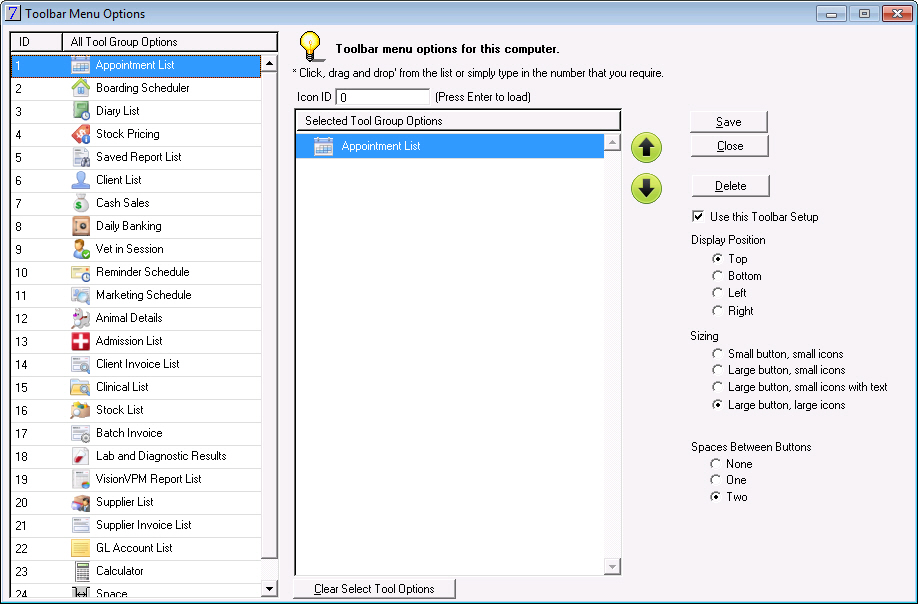
To remove the icon from the toolbar, select the required icon and then click Clear Select Tool Options.
To change the position of the icons on the toolbar use the Up and Down arrows.
You can select to position the toolbar at the top, bottom, left or right of the VisionVPM window.
There are four different sizing formats:


If you select a format without text, and you want to be reminded of an icon's name, simply hover your cursor over the icon and VisionVPM will display its name.

You can also select to enter spaces between the icons to spread out the pictures if required. You can select no, one or two spaces.
If you want to set up the toolbar now but use it at a future time, you can clear the Use this Toolbar Setup check box. When you want to use the toolbar, open the toolbar and select the Use this Toolbar Setup check box.
If you wish to clear all of the icons from the toolbar, click Delete, and VisionVPM will display the following prompt:

Click Yes to delete the toolbar.
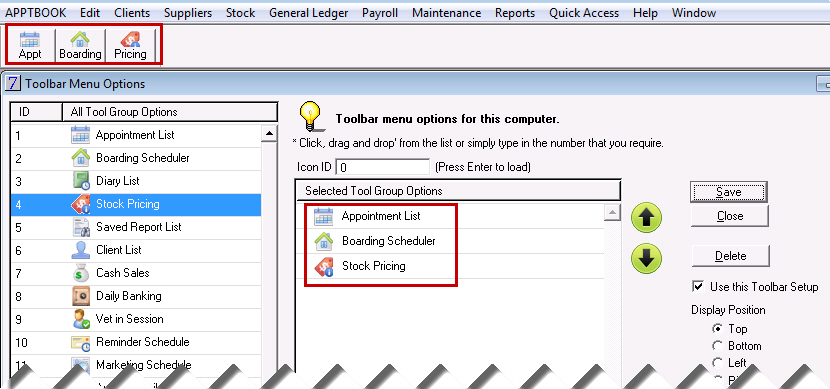
To see the toolbar as you are making changes, click Save and VisionVPM will display the toolbar.
When you completed all your changes, ensure you click Save and then Close.
Please note, VisionVPM will only display icons for items that the logged in user has access to.
See Also |