Print a stock take List
Go to: Stock menu > Stock Taking > Stock Taking Options.
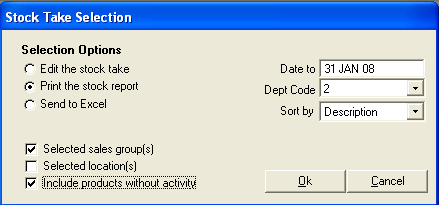
- Select Print the stock report option.
- Select the Selected sales group(s) check box, and then double-click to select the sales group that you wish to stock take.
- Optional: You can choose to stock take on multiple sales groups if you wish.
- Optional: You can choose to stock take on stock location.
- The Include Products without activity check box will be selected by default.
- In the Date to field, type the date that you are printing the list.
- This would normally be the current date.
- For a departmentalised clinic, click the Dept Code arrow, and then double-click to select the department for which you are printing the stock list.
- The Sort by field will default to Description, however this can be changed if you wish to display the list by either Code, Sales Group or Location.
- Click OK.
- Select report destination and click OK.
- Click No to the following prompt:

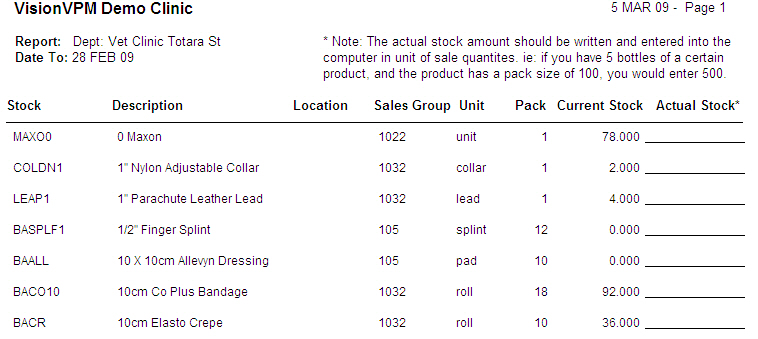
- A list of the items in the selected sales group(s) will be printed: