Go to: Stock menu > Stock Taking > Stock taking Options.
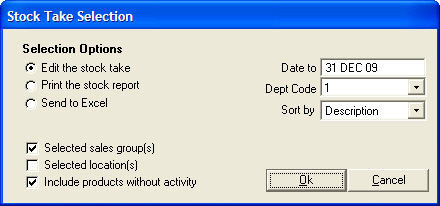
Select Edit the stock take.
To enter stock on hand quantities for selected sales groups, select the Selected sales group(s) check box and select the required sales groups, and click OK.
To enter stock quantities for selected locations, select the Selected location(s) check box, and then select the required locations, and click OK.
The Include products without activity check box will be selected by default. This will include any stock items that have recently been added to VisionVPM which have not been either purchased or sold.
In the Date to field, type the Stock Take Date, that is, the date you counted the stock.
For clinics which use departments, click the Dept Code arrow, and then select the department whose stock quantities you are entering.
Select how you want your stock take list sorted, by clicking the Sort by arrow, and then selecting the sort option.
Click OK.
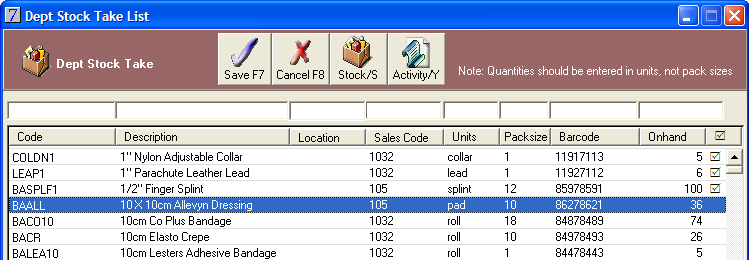
The Dept Stock Take List window will be displayed.
Please note, the Dept Stock Take List window can be maximised if required.
Adjusting each item
For each stock item that has a stock quantity which needs adjustment:
Double-click the stock item.
The cursor will be positioned in the On hand field.
Type in the stock quantity and press ENTER.
As you enter stock quantities, selected check boxes will appear beside the stock items denoting that a quantity has been entered.
Note: If you press ENTER a second time, VisionVPM will automatically load the next stock item on the list.
Any items for which you do not enter a stock quantity will be taken to have no change in stock quantity.
If you enter a quantity for a stock item and then find you have more of that stock item further down your stock list you must add the two amounts together.
For example, if you enter 10 and then find another 6 of the same stock item you need to enter 16. In this instance, stock on hand will now be 16.
When all stock quantities have been entered click Save.
Click Yes to the prompt, Save the stock take now?"
Click OK to the message, A stock variance report can now be printed if required from the Stock Reports menu.
Using a Bar code Scanner for finding stock items
In the Dept Stock Take List window, select the Use Barcode Scanner check box.
The cursor will be positioned in the Barcode field.
Point and click the stock item's barcode.
The stock item will be highlighted in the stock list and displayed in the editing line ready, for you to enter the stock quantity.
Finding stock items in the stock list without a barcode scanner:
Select the Search on Stock Code check box.
The cursor will be positioned in the Code field.
In the Code field, type the code of the stock item you are looking for and press ENTER.
The stock item will be highlighted in the stock list and displayed in the editing line ready, for you to enter the stock quantity.
Editing a saved stock take
If you need to close the stock take and then come back to it at a later date, VisionVPM will retain the stock on hand figures and markers entered previously.
Double Counts
If you enter a quantity for a stock item and then find you have more of that stock item further down your stock list you must add the two amounts together.
For example, if you enter 10 and then find another 6 of the same stock item you need to enter 16. In this instance, stock on hand will now be 16.
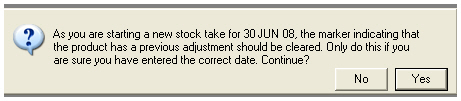
New stock take
When you do your next stock take for a different date, and are ready to enter the new stock on hand figures, the following prompt will be displayed:
When you click Yes, VisionVPM will clear the ticks from the Stock Take List window, ready to accept the new stock on hand figures.