![]()
![]()
![]()
![]()
|
|
|
|
|
Payments are either entered at the time of invoicing, or as a result of having sent out monthly accounts to clients. The methods for receipting these payments into VisionVPM are listed below:
When entering a payment at the time of invoicing you have the option to enter a single payment type or multiple payment types. This means, for example, that a client can split the payment between Eftpos and Cash.
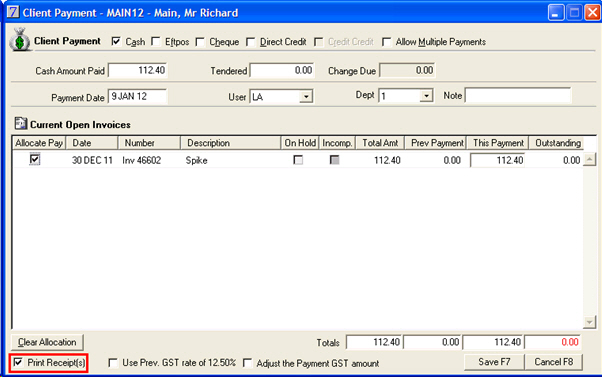
When you are entering a payment at the time of invoicing VisionVPM will default the Amount Paid field to the setting you have selected in Main menu > Maintenance module > Maintenance menu > System Defaults > Financial tab.
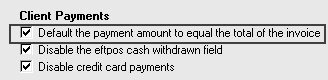
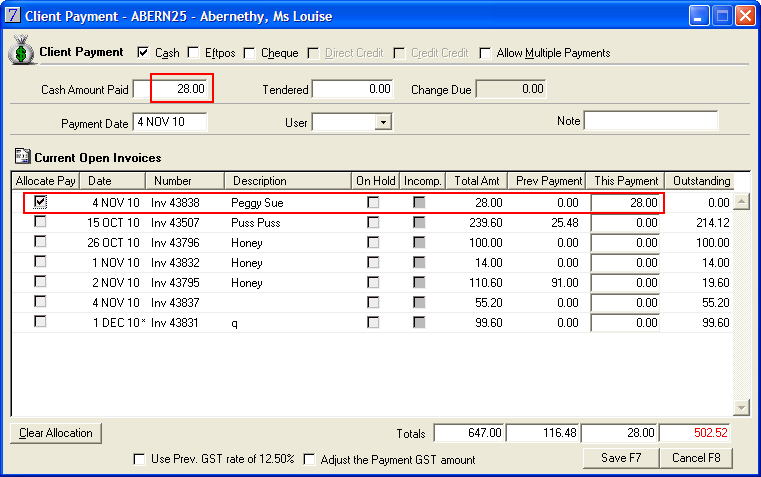
In the screen shot below, the payment amount is defaulted to the Total amount of the invoice.
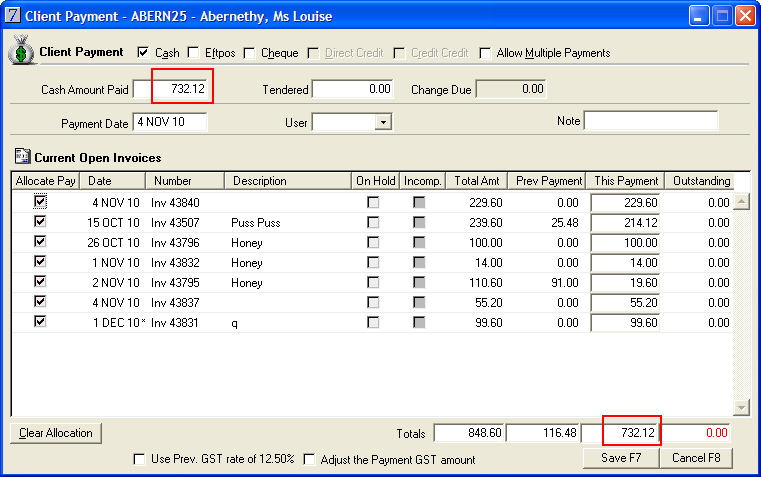
Otherwise, if the Default the payment amount to equal the total of the invoice check box is not selected, the Amount Paid field will default to the total Balance Due of the client:
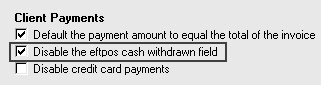
When receipting an Eftpos payment you can decide whether to allow customers to receive cash via the Cash Withdrawn field.
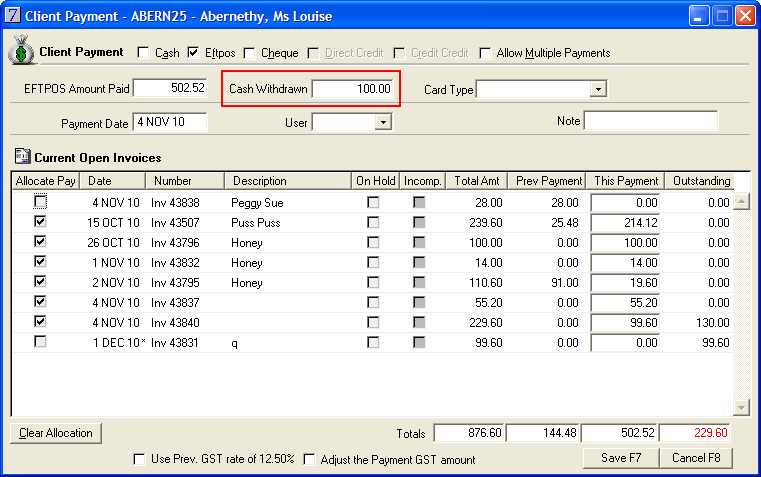
To disallow customers taking cash, select the Disable the eftpos cash withdrawn field check box in Main menu > Maintenance module > Maintenance menu > System Defaults > Financial tab.
Card Types are an optional feature and can be useful for example, when you want to separate your American Express payments, as these are normally processed a few days later than normal eftpos payments.
![]()
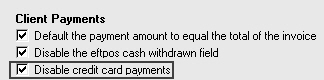
The Credit Card payment type is used for manual credit card transactions only and requires you taking the credit card payment slip to the bank as part of your daily banking.
If you are processing a credit card or debit card through your Eftpos terminal you must use the Eftpos payment type.
To stop staff accidentally using the Credit Card payment type by mistake you can disable this payment type in Main menu > Maintenance module > Maintenance menu > System Defaults > Financial tab.
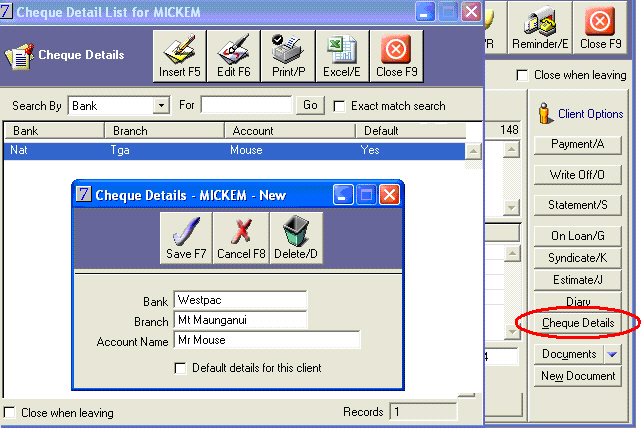
If clients make payment by cheques from different bank accounts you can enter multiple cheque account details for the client.
Go to: Clients menu > Client Details > select client.
You can also select to mark a cheque account as the default. When you insert a cheque payment, VisionVPM will automatically display the default cheque account which can be overwritten if required.
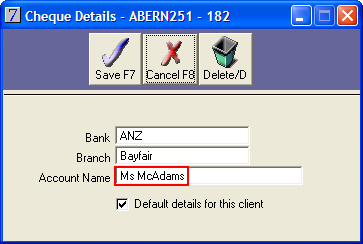
When you have selected to use mixed case names in Main menu > Maintenance module > Maintenance menu > System Defaults > System tab, ![]() , VisionVPM does not apply this setting to the Account Name of the client's cheque details.
, VisionVPM does not apply this setting to the Account Name of the client's cheque details.
This allows you to have upper and lower case letters in a name as displayed below:
In VisionVPM you have three options in regards to receipt printing. You can select a receipt printing option in Main menu > Maintenance module > Maintenance menu > Computer Defaults.
Please note: This option must be set on each computer from where you wish to print a receipt.
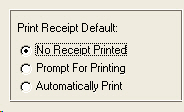
Definitions for the three options:


See Also |