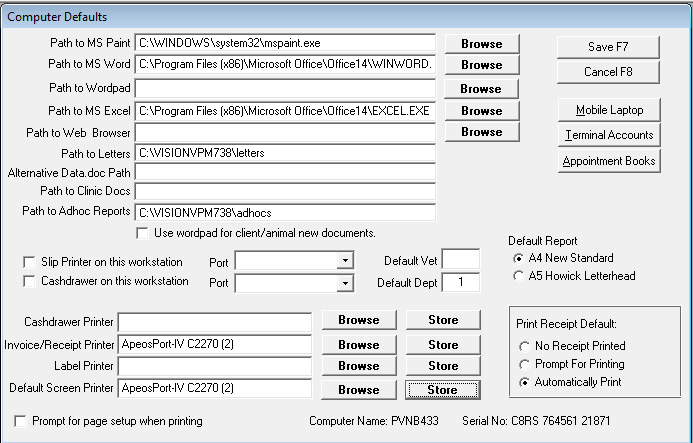
The Computer Defaults window is where individual workstation settings can be selected. These include, for example, default settings for printers, appointment books and receipts. Access to Word and Excel is also set up in this window.
To set up or change Computer Defaults
Go to: Main menu > Maintenance module > Maintenance menu > Computer Defaults.
To Set up Computer Default Paths
Most of the paths in the Computer Defaults window can be set using the Browse buttons available.
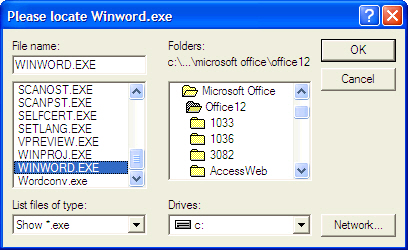
Click the Browse button to display a Please locate window.
Click the Drives arrow and then select the correct drive.
Scroll through the folders on the right. Double-click on the required folder to open and display the folders it contains.
When there are .exe files present in the folder, these will be displayed on the left-hand side of the window. Double-click the appropriate .exe file to select. The path will then be displayed in the box on the Computer Defaults window.
Ideally these paths should lead to common files on the server.
This way only one file on the server needs to be updated, rather than files on every workstation.
Clinic Docs
Adhocs
The file within the Microsoft Office folder may have a different number depending on the version of MS Office you are using, that is, it may be OFFICE, OFFICE10, OFFICE11, etc.
Set up EITHER a path to Word OR a path to Wordpad. If you choose to use Wordpad you must check the box: Use Wordpad for client/animal new documents.
To Set up printers and cashdrawers
This allows specific printers to be selected for specific purposes for this workstation. It also allows a cashdrawer to be fired by appropriate payment transactions: Cash, cheques and Eftpos (for the slips).
The options include:
Slip Printer – prints on continuous narrow paper.
Cashdrawer – opens for payment transactions.
Cashdrawer printer – a printer attached to the cashdrawer.
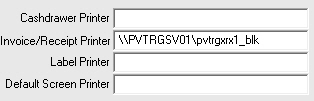
Invoice/Receipt Printer – default printer for printing invoices and receipts.
Label printer – for printing drug labels.
Default screen printer – for printing reports to screen.
To Set up a Slip Printer
Setting up a slip printer in VisionVPM is a technical procedure. We recommend consulting your local computer hardware support. Technical information is available through the Provet IT Service Desk.
To Set up a Cashdrawer
In VisionVPM the cash drawer can either be connected directly to the computer or connected to a slip printer. Setting up a cashdrawer is a technical procedure. We recommend consulting your local computer hardware support.
When the cashdrawer is connected to computer directly:
Go to: Main menu > Maintenance module > Maintenance menu > Computer Defaults
Ensure there is a tick in Cashdrawer on this workstation and enter the Port that the cashdrawer is connected to.
Where the cashdrawer needs to fire from multiple machines, set up a printer driver (of any type) and assign it to print to the cashdrawer port.
This printer can then be shared so other workstations are able to use it.
Load the name of the printer into Main menu > Maintenance module > Maintenance menu > Computer Defaults > Cashdrawer Printer.
When the cashdrawer is connected to slip printer:
Go to: Main menu > Maintenance module > Maintenance menu > Computer Defaults
Ensure there is no tick in Cashdrawer on this workstation and no entry in the Port field.
Use the facility within the printer driver to fire the cashdrawer, if available. If not use a generic/text only driver and enter the codes required by the slip printer to fire the cashdrawer.
Load the printer name into the Cashdrawer Printer box in Computer Defaults.
To set up Printers for this workstation
Setting up printers can be a technical procedure. We recommend consulting your local computer hardware support.
Before doing any printer setup within VisionVPM:
All required printers must first be installed on the PC and configured correctly.
All correct paper/label sizes must be set in Windows > Control Panel > Printers/Faxes prior being added to VisionVPM.
Test the printer is working correctly using an application such as Notepad. Do NOT use the Windows > Print Test Page functionality.
Where to set up Printers in VisionVPM:
First check the version of Omnis on the workstation. Click File > About Omnis 7.3 and check the version number.
If the computer is running Omnis 736, printers must be set up in Main menu > Maintenance Module > Maintenance Menu > Printer Setup, AS WELL AS Main menu > Maintenance Module > Maintenance Menu > Computer Defaults.
If the computer is running Omnis 737, or 738, printers only need to be set up in Main menu > Maintenance Module > Maintenance Menu > Computer Defaults.
To set up a printer in Computer Defaults
It is important to set up the printers that will be used by the workstation in Computer Defaults.
Go to: Main menu > Maintenance module > Maintenance menu > Computer Defaults
Use the Browse buttons beside the printer boxes to display the list of available printers.
Select the required printer and click on OK to close the window. Click on the Store button to store the address and it will appear in the box.
Setting Other Default Options
Several default options for the workstation can be set up in Computer Defaults.
Go to: Main menu > Maintenance module > Maintenance menu > Computer Defaults.
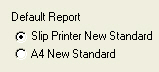
Default Report allows selection of the format for printing invoices.
The non-selected report format will only print if you select a printer NOT loaded in Main menu > Maintenance module > Maintenance menu > Computer Defaults > Invoice/Receipt Printer.
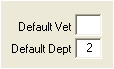
Default Vet - When a code is entered, the vet field on any item will be populated with this code. This is useful if there is only one vet at the clinic or only one vet using this workstation.
The Default Vet code can be overtyped if necessary.
If a Default Dept number is entered, this will appear in the department field on any item. This should be used when a computer is used within only one department of the clinic.
The Default Dept Code can be overtyped if necessary.
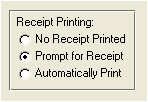
Receipt Printing - The options for printing receipts from the Client Details window are:
No Receipt Printed - No receipts are printed. VisionVPM does not offer to print a receipt.
Prompt for Receipt - When a payment is made VisionVPM will prompt to print a receipt.
Automatically Print - A receipt is automatically printed for every payment.
Click Save to save the settings and close the window.