![]()
![]()
![]()
![]()
|
|
|
|
|
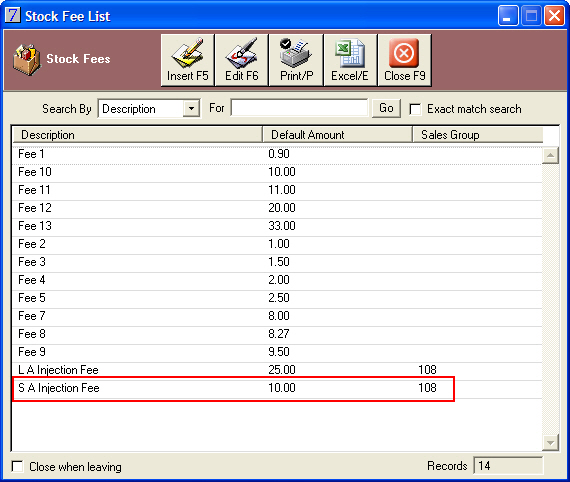
To enter a fee for dispensing the item, click the Stock Fee arrow. A list of existing fee will be displayed.
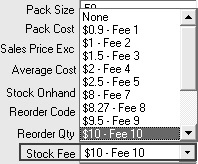
All stock fees must be created in the Maintenance module.
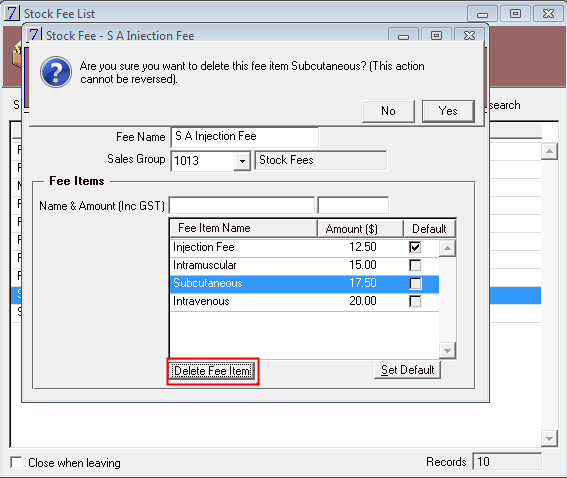
For each different fee that you want to create under the Stock Fee, enter a name and the amount. Press ENTER to drop each line down.
To enter a date after which time this item expires, in the Expiry Date field, type the date of expiry. This value is transferred to the drug label and is visible when reviewing clinical records. However this value is not updated automatically when stock is received.
To enter a dose rate for dispensing the item, in the Dose Rate field, type the standard dose rate for the stock item. This is used for information only when billing out the fee. It may save you having to look up IVS, MIMS or details from the product packaging for the correct dose.
To attach a stock letter, for example, an after surgery care letter, to the item, click the Letter Code button, and then select the code of the stock letter. This should be considered for certificates, after surgery care instructions or compliance instructions.
You can choose whether you would like to generate these documents through the VisionVPM interface or as a Microsoft Word or Wordpad document.
An example of a VisionVPM stock letter is illustrated below, with access to the merge fields in your database displayed on the right hand side of your document.
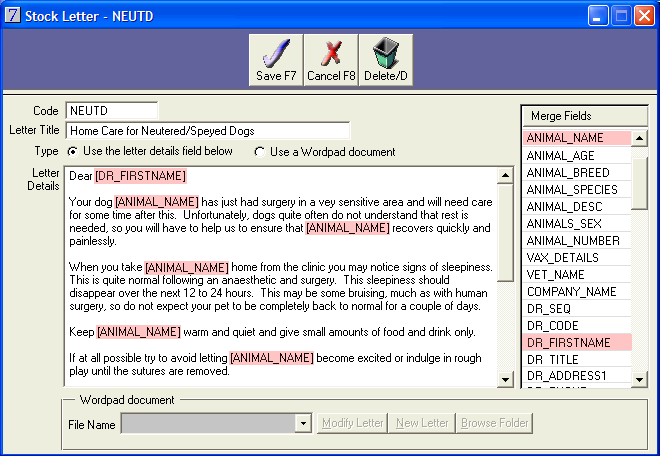
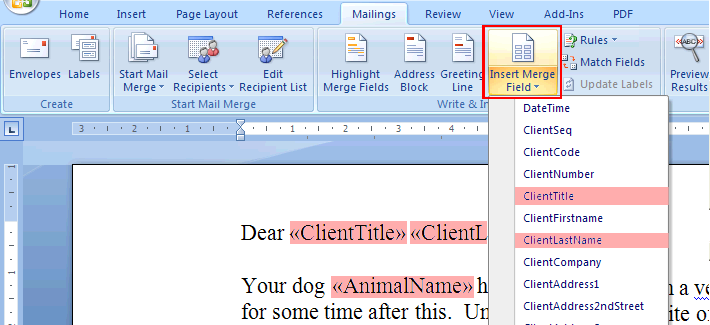
You can also generate stock letters with Microsoft Word. Creating these documents is covered in the next chapter.
Using a barcode scanner at the point of sale will ensure greater accuracy in selling the right item at the correct price. To attach a barcode to the item, in the Barcode field, type the barcode number of the stock item. Alternatively, position the cursor in the Barcode box, and scan the item. 2D Barcodes "123456789" are easy to apply and can be read with most hand held scanners.
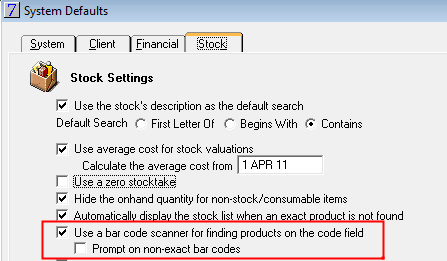
To enable barcode sales navigate to Main menu > Maintenance module > Maintenance menu > System Defaults > Stock tab > Use Barcode Scanner. You should select the Prompt on non-exact match check box, to ensure greater accuracy of selecting products at point of sale.
Barcodes can be printed out for sheet scanning. Go to: Stock module > Reports menu > Barcode labels. Stock can be selected individually or as an entire analysis group by using the Select button.

Messages are used for value adding or to describe an invoice item in more detail. To attach a message to the item which will be displayed on the invoice, click the Message arrow, and then select the code of the stock message.
Example 1: Attached to Clavulox or other antibiotics: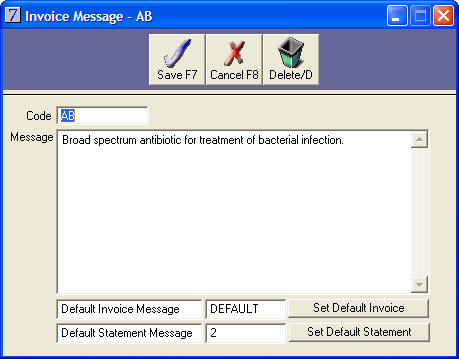
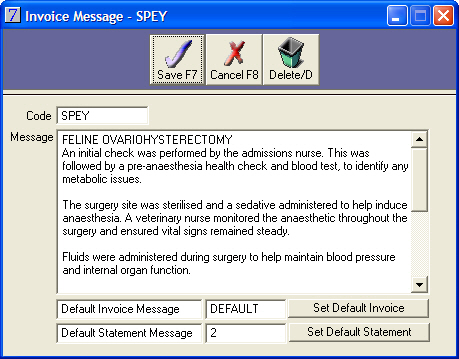
Example 2: Attached to Spey:
Stock take lists can be filtered by product locations, allowing you to divide and conquer the work load during inventory counts. To enter a physical location for the stock item, use the Location field. You may decide to create general locations such as Dispensary, Foods, Safe, etc. However this is most effectively applied to high value, high turnover items that are often hard to keep track of.
For example, you might create a Location called = High Sensitivity. Any stock items that are added to this group will be counted every week. to ensure that on hand levels are accurate and that stock is being managed effectively. Rolling stock takes are discussed further in the chapter on Stock Taking.
Applying stock locations to multiple stock items is discussed further in the chapter on Stock Locations.
Generic Name allows you to use the common name of the stock item. This can be used as an alternative to the full technical description on invoices and labels. Generic name can also be used as a search parameter when invoicing stock. If Clavulox is out of stock then you can do a search for alternatives by generic name.
To print the generic name on invoices, you will need to change the setting in Main menu > Maintenance module > Maintenance menu System Defaults > Financial tab > Use the generic name on client Invoices.
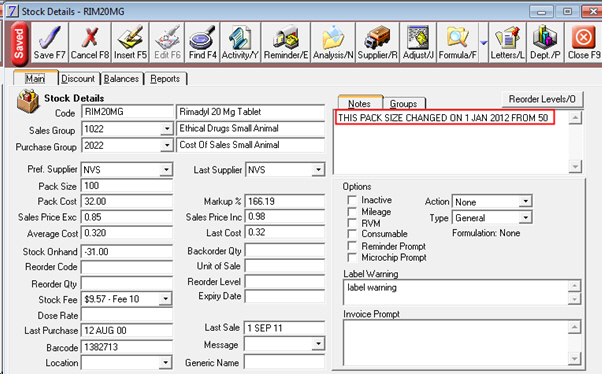
To attach notes to the item, in the Notes tab, type any relevant notes about the stock item, such as ordering information, pricing exceptions, or storage and handling instructions.
To mark an animal as either neutered or deceased on the sale of this item, click the Action arrow, and then select the action to be performed.
NONE, DECEASE, NEUTER. This is critical to ensure you do not send desexing reminders or correspondence to deceased patients.
These are a broad overview reporting category used in the Vet Stock Type Analysis Reports (sales by vet) accessed from Stock module > Reports menu > Vet Stock Type Analysis. To attach a stock type to the stock item, in the Type field, select the type of the stock item. The types available are:
These options are locked down and cannot be added to, or modified.
Stock records that are no longer required can be made 'Inactive'. When searching for a stock record if search 'all' stock records has been selected then the inactive stock records will be displayed in a light blue colour.
These stock items are automatically calculated from Client Charging Distance on the Client > Settings tab on each client record.
They can also be automatically calculated from the Patient Location field on an equine record, where the patient location might be stud or paddock with a set distance from the practice.
To generate a mileage charge on an invoice when this stock item is sold, select the Mileage check box, for example, Farm visit fees. You might create fee items such as:
with reducing multipliers to share the burden of travel between multiple clients.
To mark the stock item as a Registered Veterinary Medicine, select the RVM check box. If the RVM check box is selected and the client does not have a current RVM authorisation, a prompt will appear every time there is a sale of this product not linked to a clinical record. RVM authorisations for products can be added to client details. If there are any RVM authorisations in place, the RVM check box will be selected.
If a stock item is a low cost in-house consumable, then these can be marked a a consumable item. Any stock items marked as consumable will not be included in your stock valuation. For further information regarding consumables refer to the sections in this User Guide 'Consumables'.
If this check box is ticked and there is a reminder attached to the stock item then the User will be prompted to add the selected reminder to the animal's record.
If this prompt is checked on the stock record used for micro - chipping then this will automatically prompt the User to insert the Microchip number in the animal details.
The Label Warning field, will display any extra instructions on your standard drug label. This will display in addition to the global label setting that should already be established in Main menu > Maintenance module > Maintenance menu > System Defaults > Setup Drug Labels.
If a drug is ALWAYS sold with the same dosage instructions, you may decide to pretype them here.
"1 X Tablet twice a day", or "Keep Refrigerated"
To display a message for up-selling of other products when the stock item is sold, type the details of the other products in the Invoice Prompt field. This can be handy for advertising promotions.
To enter discount prices for the stock item, click the Discounts tab, and then enter the appropriate discounts.
Discounts will be discussed further in the section on Stock Discounts.
See Also |