![]()
![]()
![]()
![]()
|
|
|
|
|
The Provet handheld scanner can be used for stock taking. The following instructions are an overview of the process. More information can be obtained from your Provet Account Manager or from Provet IT.
The stock take process involves:
If you have done a previous stock take using the Provet e-Order stock take module you should backup this information before you begin. You can do this by copying the eoStkTake.mdb file from the e-Order directory onto removable media such as DVD, tape or memory stick. Typically this file is stored in the c:\program files\e-Order directory.
If the clinic is using departments, it is vital that the departments in Provet e-Order are matched to the departments in VisionVPM before uploading.
To do this, use the main Provet e-Order shortcut on your desk top (N.B. Not the Provet e-Order stock take shortcut).
Once you have logged on, the Launch Pad will be displayed.

Click System Setup and Options and then click the Locations tab.
The departments set up within Provet e-Order will be displayed.
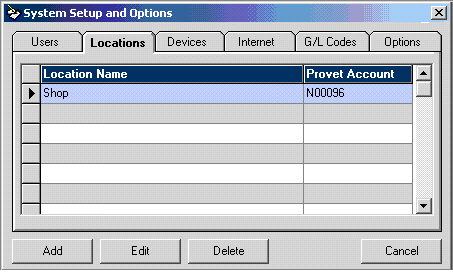
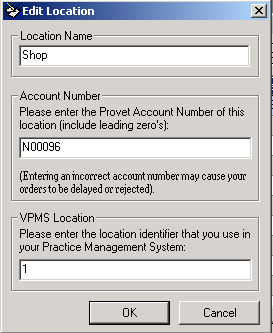
Either double-click the desired location, or highlight the location and click the Edit button to open the Edit Location window.
You will need to contact the Provet IT Service Desk to obtain a blank copy of the e-Order stock take database.
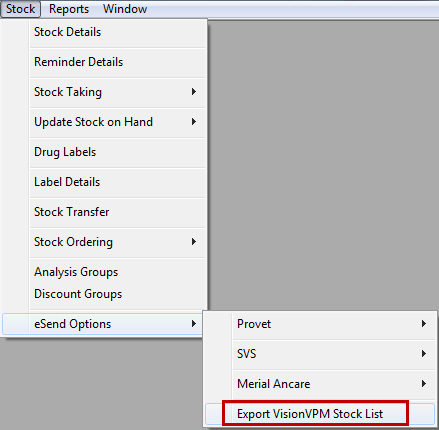
This function will create a text file containing all active stock records. This is used to populate the e-Order stock take database with all active stock records including those marked as Discontinued. The text file will contain the stock sequence number, description and pack size. This file does not contain the Provet codes.
Click Yes to the the following prompt:

Click No to the following prompt, as you will want all stock records to be captured:

VisionVPM will display a message similar to the following:

You can then import this file into e-Order
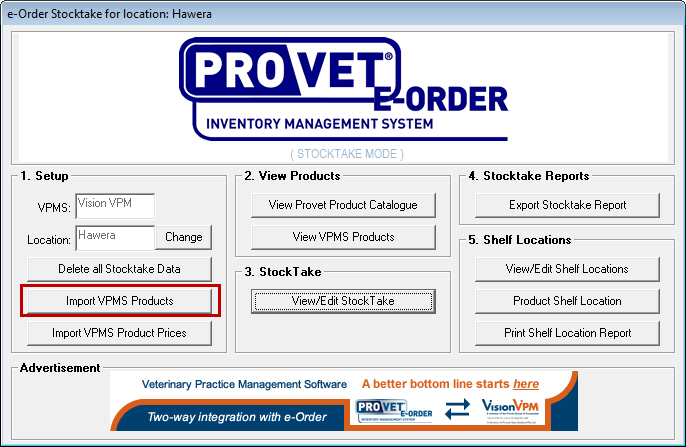
You will then need to navigate to the path where VisionVPM created the text file above and select the text file. For example, C:\VISIONVPM_LATEST\VPM_Stock.txt as from above.
This will send the VisionVPM stock list to the Provet e-Order stock take database automatically so that those products can have barcodes printed and are available for use through the hand held scanner.
Please note, VisionVPM does not export inactive stock items or those marked as Discontinued.
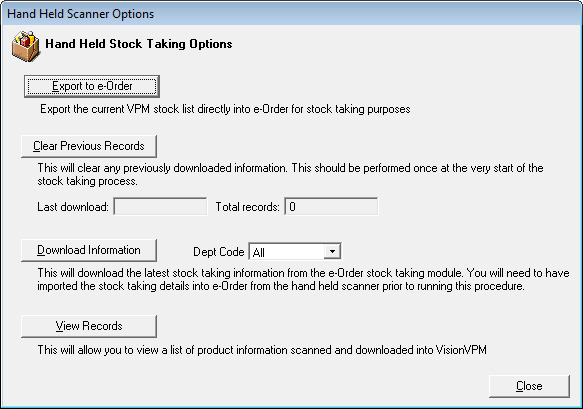
Go to: Stock menu > Stock Taking > Hand Held Scanner Options.
Using the Provet e-Order Stock Take module, process the stock take. For further information regarding stock taking, please refer to your Provet e-Order manual.
When you are ready to download the stock take information back into VisionVPM:
Go to: Stock menu > Stock Taking > Hand Held Scanner Options > Clear Previous Records.


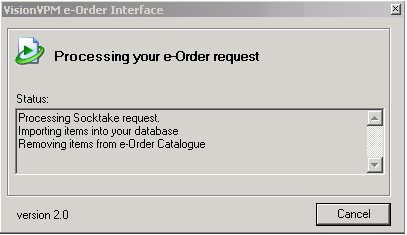
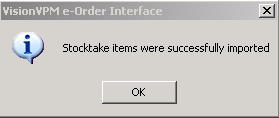
This will import any stock taking information that has been downloaded from the hand held scanner into Provet e-Order. An optional department can be specified or use 'All' to download stock taking records for all departments. Stock taking can be moved from Provet e-Order to VisionVPM in steps or in a single download. Once imported, this information will be stored in a separate table within VisionVPM and the user will be automatically prompted as to whether they want to bring this information through when the next stock take is performed.
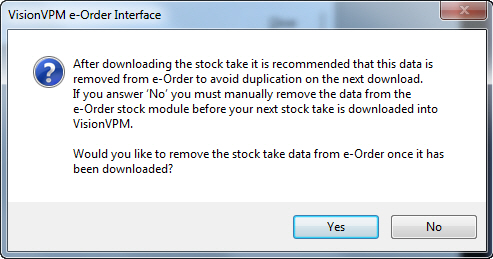
Once you can confirmed that you do not want to remove the stock take data from e-Order, VisionVPM will begin downloading the stock take information.
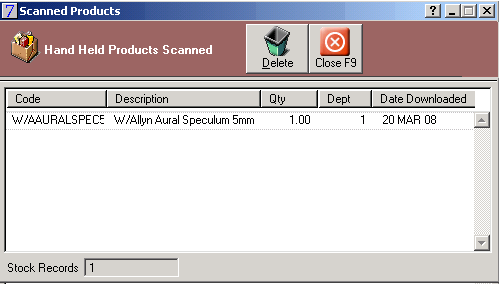
Go to: Stock menu > Stock Taking > Hand Held Scanner Options > View Records.
The downloaded records can be viewed using this facility. A window will be displayed giving a list of all products downloaded into VisionVPM. The quantity, department and downloaded date are also displayed. If required, individual products can be deleted from this window.
You can select to zero the stock on hand quantity as at the date of the stock take. To do this:

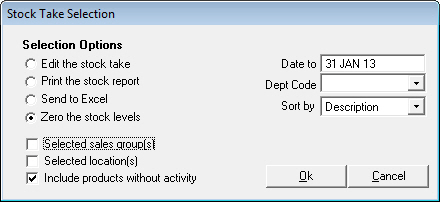

VisionVPM will then zero stock on hand quantities for all departments.
The downloaded stock take information is held within the table shown above, in VisionVPM. Each time a download is completed from Provet e-Order, the table is added to.
Once all the stock items have been downloaded into VisionVPM, they must be inserted into the stock take.


You can then print the Stock Variance report.
See Also |