![]()
![]()
![]()
![]()
|
|
|
|
|
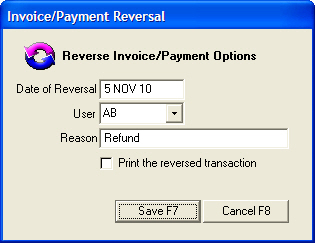
Go to: Clients menu > Client Details > select client > Activity > select invoice > Reverse.
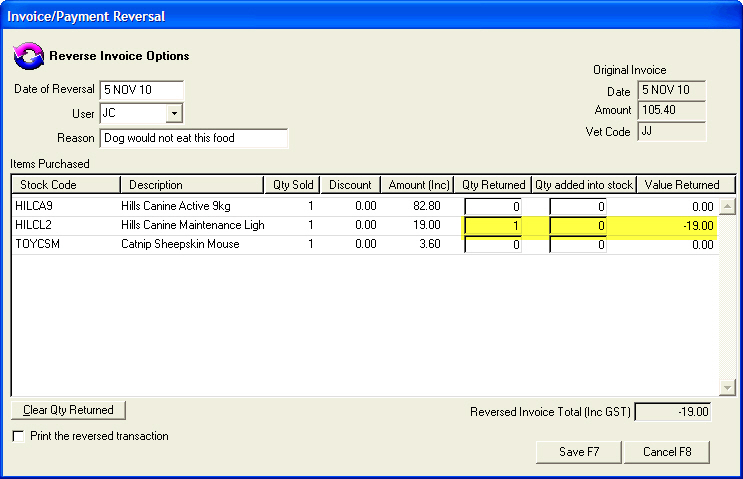
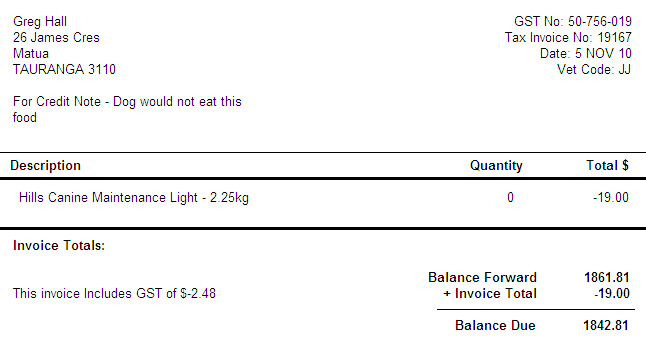
Select the Print the reversed transaction check box to print the reversed invoice.
Click Save.
Please note: If the original invoice date is in a PREVIOUS GST PERIOD you will need to enter a date of the 1st of the current GST month, for example, GST paid end March, invoice to be credited 20 March. The Reversal Date will need to be 1st April.
If the invoice has been fully paid, VisionVPM will display the following prompt:

If you are giving the client a refund click Yes to open the Client Payment window from where you can receipt the refund, otherwise click No to allocate the credit to the account.
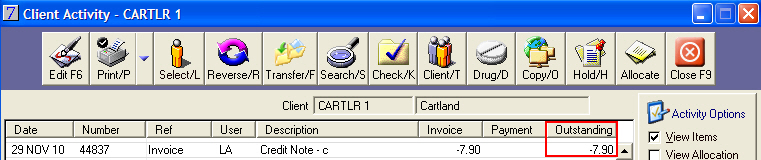
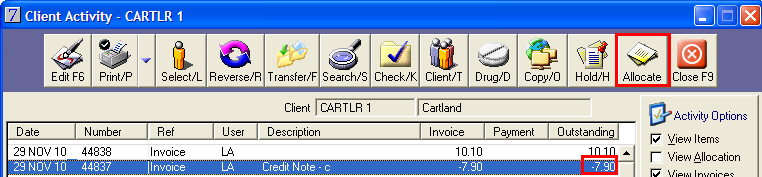
Please note, if you do not give the client a refund, the reversed invoice will remain on the client's activity as Outstanding. See screenshot below.
The next time an invoice is entered for the client you should manually allocate the credit note to the invoice.
To do this, select the credit note and click Allocate.
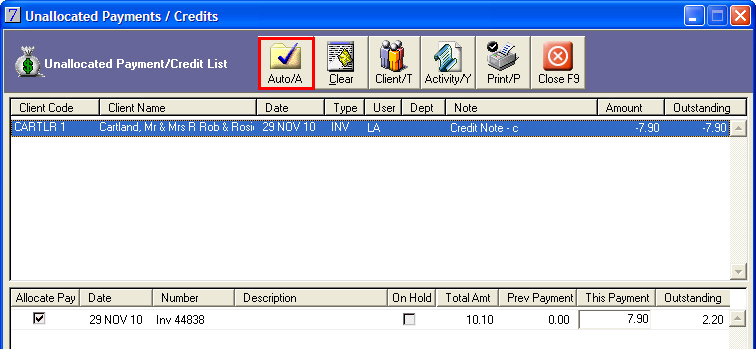
VisionVPM will display the Unallocated Payments / Credits window, from where you can manually allocate the credit invoice or click Auto to let VisionVPM automatically allocate the credit note.
See Also |
VisionVPM allows you to edit payments for the following circumstances:
Through this process, you can also change the invoice allocation.
You can only edit a Cash, Cheque or Credit Card payment and if you have not saved the Till Balance or Eftpos Deposit according to the payment type you are attempting to change. If you attempt to change a payment after either the Till Balance or Eftpos Deposit has been saved, VisionVPM will display the following message:

You can only edit a Direct Credit payment if you have not reconciled this payment on a bank statement.
If you attempt to edit a Direct Credit payment after the payment has been reconciled, VisionVPM will display the following message:

If you are using usernames and passwords you will only be able to edit a payment if your username has been marked to allow access to changing client payments.
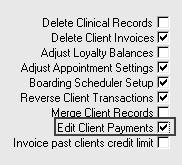
To change the setting you must be logged into VisionVPM with the administrator password and then go to: Main menu > Maintenance module > Maintenance menu > Users Access. Select the Edit Client Payments check box.
If you do not use usernames and passwords you will be required to enter the daily password. Please contact the Provet IT Service Desk to obtain the daily password.
Please note, if you are using Data Transfer and you attempt to edit a payment created at another branch, VisionVPM will display the following message:

You can reverse payments if, for example, you enter an incorrect payment amount or payment type and the banking has been completed.
If the banking has not been completed you can simply edit the payment transaction, as described above.
If you have entered a payment on the incorrect client, you can transfer the payment to the correct client. Please refer to the Transferring invoices and payments section in this user guide for further information.
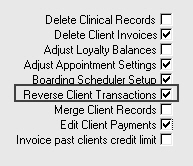
If you are using the password system in VisionVPM, to allow users to reverse a client's payment, the Reverse Client Transactions check box must be selected in the User Access window.
Go to: Main menu > Maintenance module > Maintenance menu > Users Access.
Go to: Clients menu > Client Details > select client > Activity.
![]()
Optional:
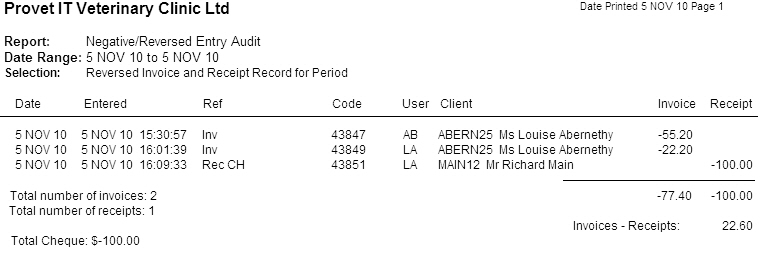
The credit note will also appear on the Negative/Reversed Entry Audit report.