Text messaging is available in VisionVPM through a third-party service provider.
With Text messaging you can have the functionality to send messages to groups of people or individual clients. You also have the ability to receive text messages.
There is an initial set up fee payable to the service provider and an ongoing monthly fee with the service provider which is fully redeemable for message credits each month.
You can send messages from the following areas within VisionVPM:
Marketing Schedule
Reminder Schedule
Appointment List
Client Details
Text messaging setup
To enable text messaging in VisionVPM, you will need to complete the following steps:
Complete the appropriate SMS 25 Application Form that is attached to this update email and fax to the service provider. These are available on the VisionVPM Website. Go to: VisionVPM > Help > VisionVPM on the Web : then either Release Notes or VPM Integration > Message Media. Note: There are different application forms for New Zealand and Australia.
Once confirmation has been received from the service provider you can then set up text messaging in VisionVPM. In VisionVPM go to Clients module > Clients menu > Email / SMS Options > SMS Setup.
Enter the username and password that has been provided to you by the service provider.
Creating pre-defined Text Messages
Save time and ensure consistency by creating pre-defined text messages. You can select from these templates when sending a text message for reminders, marketing searches and appointments.
To set up Reminder or Marketing messages
Generate a Marketing or Reminder list in the usual way.
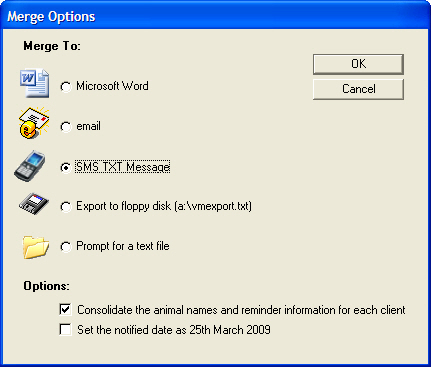
From the Search Results window, click Merge.
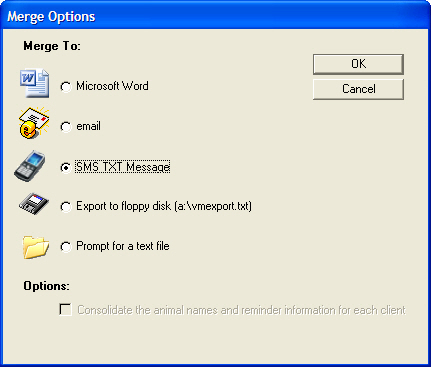
Select SMS Txt Message and click OK.
If you are merging to a reminder SMS Txt Message, select Consolidate the animal names and reminder information for each client, so only one text is generated for clients with multiple animals and reminders.
The following window will be displayed.
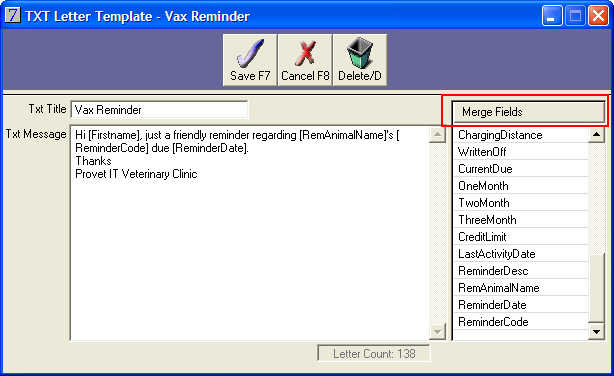
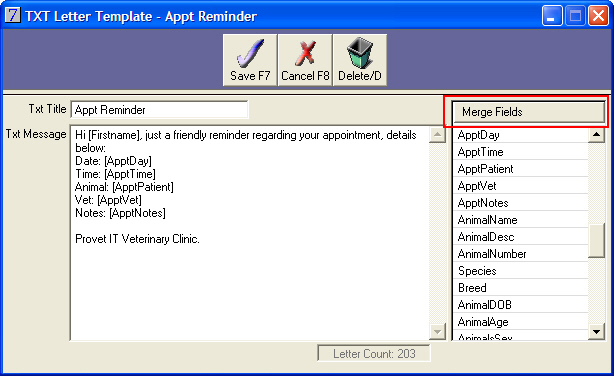
Click the Message arrow, and click Insert from the Txt Message List window. You can then create your message using Merge Fields, example below:
When completed, click Save.
To set up appointment text messages.
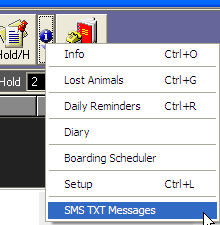
Go to: Main menu > Appointment List.
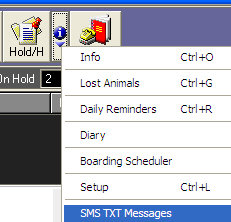
Click the Information arrow and select SMS Txt Messages.
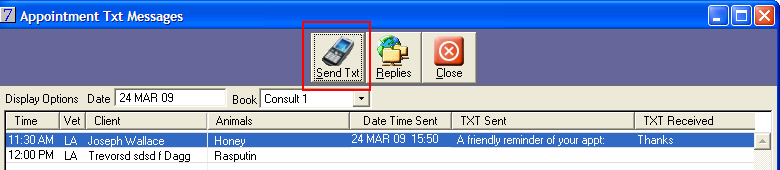
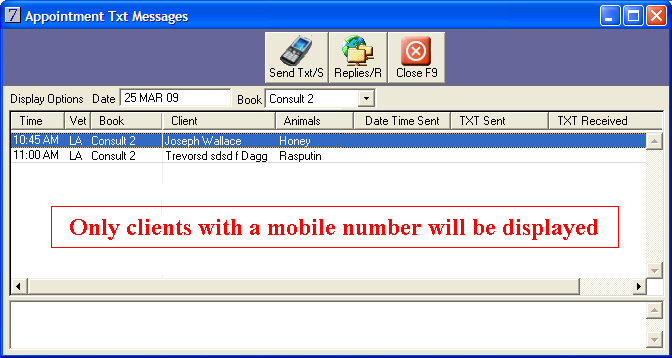
From the Appointment Txt Messages window, click Send Txt. Note: You must select a day where the displayed clients contain a mobile phone number.
The following window will be displayed.
Click the Message arrow, and click Insert from the Txt Message List window. You can then create your message using Merge Fields, example below:
When completed, click Save.
Sending Text Messages from the Marketing or Reminder Schedules.
Generate a Marketing or Reminder list in the usual way.
Click Merge.
Select SMS Txt Message.
Click OK.
The following window will be displayed.
You can Select an existing message or Use the following Quick Message.
Selecting an existing message Click the Message arrow and double-click to select one of your templates created earlier.
Use the following quick message. Type the message you wish to send.
Preview the messages.
Click Send to send the messages.
Note: Messages over 160 or more characters will be split over 2 or more texts.
Sending Text Messages from the Appointment List
You can send text messages to all of appointed clients in the appointment book, or to individual appointments.
Sending bulk text messages
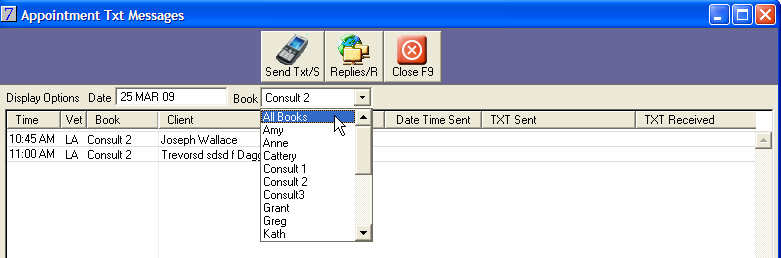
Go to: Main menu > Appointment List.
Click the Information arrow and then select SMS Txt Messages.
The following window will be displayed:
You can send text messages to clients in a single appointment book or all appointment books. VisionVPM will default to the currently selected appointment book.
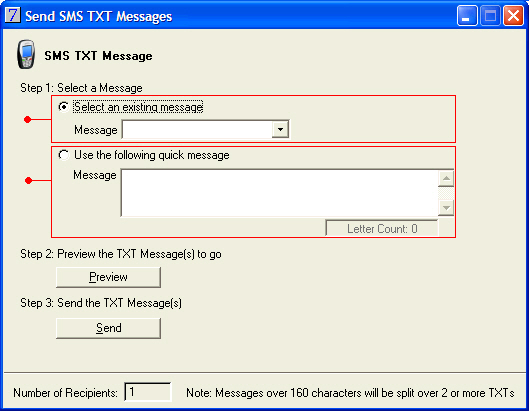
Select the clients to whom you wish to send a text message and click Send Txt. The following window will be displayed.
You can choose to select an existing message or enter a message that will be used for this text only.
Select an existing message. Click the Message arrow and double-click to select a message.
Use the following quick message. Enter the message that you wish to send.
Preview the messages.
Click Send to send the messages.
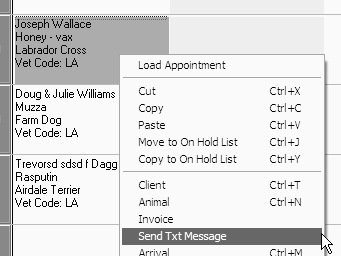
Sending Individual Texts
Right-click on an appointment, and select Send Txt Message.
The following window will be displayed.
You can choose to select an existing message or enter a message that will be used for this text only.
Select an existing message
Click the Message arrow and double-click to select a message.
Use the following quick message.
Enter the message that you wish to send.
Preview the messages.
Click Send to send the messages.
Sending individual client messages
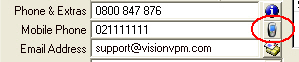
Go to: Clients menu > Client Details > select client.
Click the Mobile Phone icon, as displayed below:
The following window will be displayed.
You can choose to select an existing message or enter a message that will be used for this text only.
Select an existing message
Click the Message arrow and double-click to select a message.