In-clinic laboratory results can be entered manually for individual animals. Alternatively you can import lab results that a laboratory has emailed to you, either manually or automatically.
Currently, Gribbles' associated laboratories and NZ Pathology emails are compatible with VisionVPM. If you use a different laboratory, please forward their email to the Provet IT Service Desk in order that compatibility can be verified.
How to view existing Lab results
Go to: Clients menu > Animal Details > select animal > History tab.
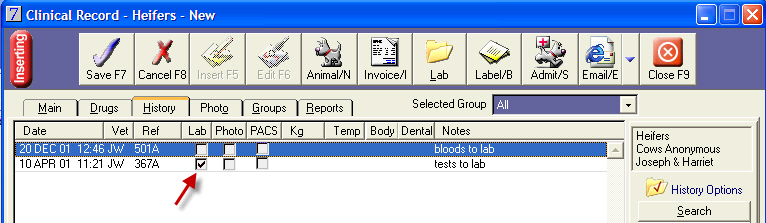
The Lab check box will be selected for all clinical records that have laboratory results attached.
Select the clinical record for which you wish to view laboratory results, and click Lab Results.
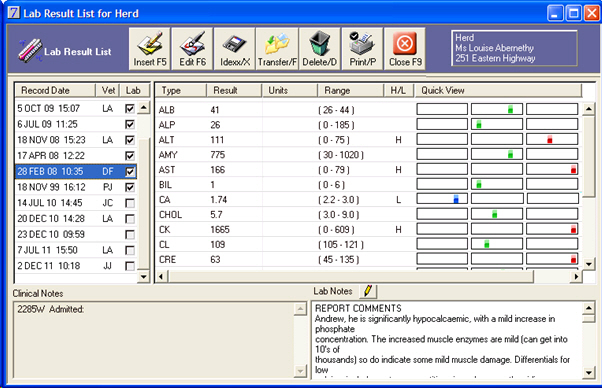
Laboratory results attached to the selected clinical record will be displayed.
To edit a result, double-click the required result line.
To print a result, select the required result and click Print.
Loading Lab results manually
Results generated in-clinic, for example, from dipsticks or meters can be entered manually.
Go to: Clients menu > Animal Details > select animal > History tab.
Select the clinical record for which you wish to add laboratory results, and click Lab Results.
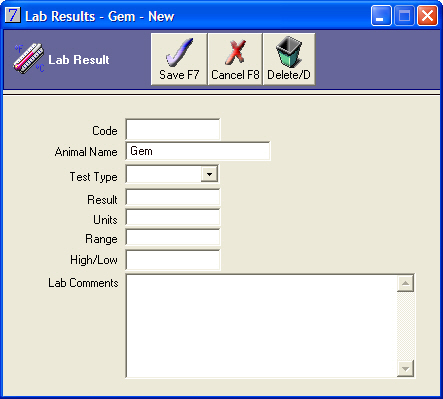
Click Insert and then type the result in the Lab Results window:
There is a Test Type lookup list in Maintenance menu > Lookup Lists > Clinical Related Lists> Diagnostic Types. The Diagnostic types are laboratory codes with high and low values for normal and absolute values. It is not essential to add these codes, but it will help VisionVPM plot the results in the laboratory results graph correctly if they have been created.
Please refer to the Maintenance User Guide for further information regarding Test Types.
Click Save.
For each result use a new Lab Results window.
Importing Lab Results manually
Clinics that do not have the Lab Wizard software can import lab results manually.
First, a system for saving the emailed lab results must be set up.
Set-up
You need to create a Lab Results folder within your Omnis7 or VisionVPM folder:
Right-click on Start and click Explore.
Locate your omnis7 or VisionVPM folder.
Click the File menu and select New and select Folder.
Name the folder Lab Results.
Save received email lab results as a .txt file in the Lab Results folder.
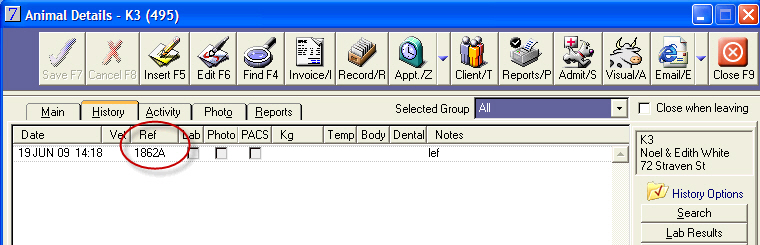
When you send your laboratory samples you will need to give the laboratory a reference number (Subref). This links the lab result to the correct clinical record of the correct patient. The number can be found in the Ref column from the History tab of the Animal Details window.
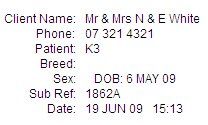
The Subref number will also print on animal labels printed from the Clinical Record window.
Importing
Go to: Clients menu > Lab and Diagnostic Results.
Click Import.
Locate the file directory for lab results.
Double-click the required file.
VisionVPM loads the results, automatically posting each animal's results into the clinical record for you.
You can view all the results on that screen, or go into each individual animal screen and view results there. Following is an example of animal's lab results.
Importing laboratory results using Lab Wizard
Lab Wizard is an optional software add-on for VisionVPM. Once set up, laboratory results received from the laboratories will be imported to the specific records of the specific animals tested. Currently this is only available for emails from Gribbles' associated laboratories and NZ Pathology.
The laboratory produces results in text emails in which each set of results contains a unique ID (Subref) linking the result to a specific clinical record of a specific animal.
The results can be imported from the email directly into the correct clinical records of the correct animals.
Go to: Clients menu > Import Lab Results.
Click Labs to start the process.
All lab results will be downloaded into the correct clinical record automatically in one easy step.
If, for some reason a lab result does not find a matching clinical record within VisionVPM, it will be listed at the end of the process with options available for loading or exiting.
Please contact the Provet IT Service Desk for full information on the Lab Wizard software and set up.
Loading Lab results from Idexx Floppy Disk
To import your laboratory results into VisionVPM from your Idexx machine you will first need to know how to save your results onto a floppy disk from your Idexx machine. Please refer to the manual provided with your Idexx machine.
Go to your Idexx machine menu and Save your lab results onto a floppy disk.
Insert the floppy disk into Drive A: on your computer.
In VisionVPM go to Clients menu > Animal Details.
Select the animal for whom you wish to import the laboratory results.
Click the History tab and select the clinical record to which you wish to attach the laboratory results.
Click Lab Results, and then click Idexx.
Click Yes to the prompt, Please place the disk from your Idexx machine into your floppy drive now. Continue?
Click the Drives arrow and select 3˝" FLOPPY (A:).
Double-click the folder named MON and double-click the laboratory result for the selected animal.
The Idexx results for this animal will be attached to the selected clinical record.
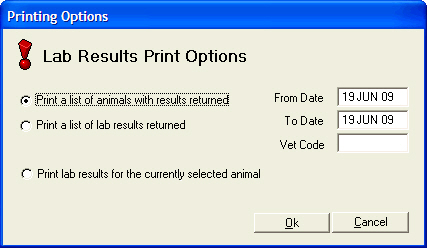
Printing Lab Result Reports
After you have downloaded laboratory results, the following print options are available when clicking Print on the Lab Results window: